Paint Repair at Home: How to Fix Imperfections on Your Car's Paintwork.
Unfortunately, no matter how carefully we treat it, usage does show on the exterior of every car. Many people ask every day how they can DIY repair scratches and minor damage on their car's paintwork and what materials they should use for it. Our article aims to provide assistance, even for beginners, on repairing paint imperfections at home, with an overview of the necessary products and processes.
As a first step, let's wash the car and assess the extent of the damage, as the technology to be applied depends on the nature and severity of the issue. I hope I'm not stating the obvious when I say that a vehicle's paintwork consists of multiple layers. It starts with a base coat on raw metal, followed by a color coat, and in the case of metallic paint, a clear lacquer coat. When examining the damage, we need to determine how many layers the scratch has penetrated.
Light scratches on the clear coat can be easily removed through polishing. RUPES or 3M polishing compounds work by gently grinding down the damaged portion of the clear coat, restoring the paint's shine. This process can be done by hand or with a machine for larger areas. However, when machine polishing, it's crucial to be very cautious to avoid over-sanding or potentially burning through the clear coat.
Stone Chips
In the case of very small 1-2 mm damages, you can skip the primer layer and simply replace the topcoat. It is recommended to repair any damages that visibly penetrate through the clear coat, paint, and primer layers before rusting begins, as the complexity of the repair increases as time goes on.
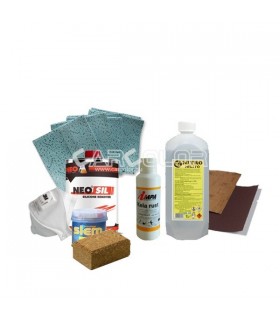
• Start by degreasing the surface using NEO Silicone Remover. Always use two cloths: one for applying the degreaser and another for wiping the surface. Do not allow the degreaser to evaporate on its own! Never use a thinner for degreasing, as it can dissolve the paintwork of your car.
• It's essential to fill in the paint damage in such a way that it doesn't bulge out from the surrounding area. To achieve this, use an appropriately sized brush or touch-up pen.
Rust
If the damage is older and rust has already begun to develop, you should start the repair by removing the rust. Rust removal should be done very thoroughly, as even the slightest oversight can result in blistering of the fresh paintwork within a few months.
• Begin the surface repair with sanding. Whether it's manual or machine sanding, use at least P120-grit sandpaper.
• After mechanical rust removal, coat the surface with Kela Rust rust converter, which, when combined with rust, forms a blackish-purple stable metal complex and prevents the formation of new rust. Wait for 3 hours for the chemical reaction to take place, then clean the treated surface with nitro thinner.
• For thorough protection, treat the surface with zinc spray.
• If sanding leaves deep marks on the metal, use NEO F20 filler to fill in the missing parts. In the case of perforated metal, use fiberglass putty, which provides adequate support.
• After the putty dries, sand the surface with P220-grit sandpaper, then refine it with red abrasive.
• Apply IM 2004 Spray filler to the surface and, after it dries, create the perfect shape using P320 and P400-grit sandpaper.
• Sand the transition with gray abrasive.
• If the metal shape is correct and the surface is as good as new, the next step is painting. Before painting, clean the surface again with a degreaser and remove any dust with a tack cloth.
If, while trying to remove the rust spots, the metal completely corrodes and this occurs on structural elements like the chassis or load-bearing components, it's best to entrust the repair to a professional.
DIY Paint Repair with Spray Paint
Depending on the size of the damage, decide whether to use spray paint or a brush. It's essential not to use a brush for any damage larger than a five-forint coin (approximately 20 mm in diameter). Before spraying, cover the rest of the car using masking paper and masking tape. Avoid masking the repair area directly because you'll need to blend the old and new surfaces with a smooth transition. If possible, align the painted area's edge with a panel contour or a separation element, where the light naturally breaks, to achieve a seamless finish.
When using spray paint, apply it to the metal surface from a distance of about 20-30 cm (8-12 inches) using even, parallel wrist movements. If your motion is too slow or if you spray too closely, the paint may run. On the other hand, spraying from too far away may result in inadequate coverage. Before painting the car, it's a good idea to practice on a piece of scrap metal to get the hang of the right movements. Achieve perfect coverage by applying multiple thin layers; never apply a thick layer of paint.
After the paint has dried and any gloss has diminished, you can apply a 2K clear coat if necessary, especially for metallic paint. Avoid washing the surface for at least four weeks to allow the paint to fully cure and harden. This will help ensure the longevity and quality of the repair.
The smallest bodywork repairs indeed demand great skill and meticulous work. Even the most skilled DIY enthusiast's work may not reach the level of professional auto body shops. Nevertheless, with a bit of practice and dedication, you can achieve significant improvements and save a fraction of the cost of a full repaint. Please be aware that you undertake these repairs at your own risk, and our company does not take responsibility for any potential errors or issues that may arise.
Used Products:
Töltött spray termékek - színkód alapján
Zsírtalanító - Szilikon lemosó
Polírpaszták
Ecset
Javítóstift
Csiszolópapír
Rozsdaátalakító
Cink spray
Üvegszálas kitt
Finom kitt
Füller spray
Színtelen lakk
This translation is generated automatically by artificial intelligence. We do not take responsibility for any possible errors.


