


In stock
400 Ft
(tax incl.)
Online price

Maintaining the pristine appearance of your vehicle's hood is a challenge, especially when faced with the inevitable scratches and chips from gravel and road debris. However, fear not – with the right tools and a bit of patience, you can master the art of paint touch-ups and keep your car looking as good as new. In this blog post, we'll guide you through the process of using a paint touch-up kit to restore the beauty of your vehicle's hood.
Step 1: Prepare the Canvas
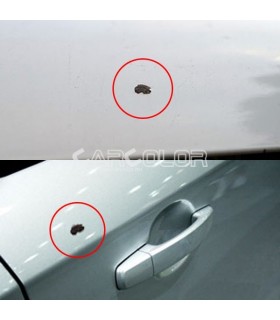
Before diving into the touch-up process, start by cleaning the damaged area thoroughly. Use a mild cleaner or isopropyl alcohol to eliminate any contaminants that might interfere with the adhesion of the touch-up paint. Ensure the surface is dry before moving on to the next step.
Step 2: Smooth the Surface (Optional)
For scratches with rough edges, consider using fine-grit sandpaper (around 600-800 grit) to gently smooth the area. Be cautious not to overdo it, as excessive sanding can affect the surrounding paint.
Step 3: Shake, Rattle, and Roll
Shake the base color paint pen or bottle vigorously for about a minute. Proper mixing is crucial for achieving a consistent and seamless finish. Follow the specific instructions provided with your touch-up kit.
Step 4: Apply the Base Color
With a steady hand, apply the base color paint to the damaged area. Use light, controlled strokes, opting for multiple thin coats over a single thick layer. Allow each coat to dry thoroughly before adding the next.
Step 5: Patience is a Virtue
Waiting for the paint to dry is perhaps the most challenging part of the process. Exercise patience and resist the temptation to rush, as premature handling can ruin your hard work. Refer to the instructions for recommended drying times.
Step 6: Seal the Deal with Clear Coat
Once the base color is dry, it's time to apply the clear coat. This protective layer adds a glossy finish to your touch-up job while safeguarding the base color. Apply thin, even coats and allow ample drying time between each layer.
Step 7: Final Inspection
After the clear coat has dried, inspect your handiwork. If necessary, use a fine polishing compound to blend the repaired spot seamlessly with the surrounding paint, achieving a flawless finish.
Step 8: Unveil the Masterpiece
Carefully remove any painter's tape used to protect surrounding areas, revealing the revitalized hood beneath. Clean up any overspray or residue with a mild cleaner, and step back to admire your handiwork.
Conclusion:
Mastering the art of vehicle hood paint touch-ups requires attention to detail, patience, and the right tools. By following this step-by-step guide, you can restore your car's hood to its former glory, protecting its value and ensuring that it turns heads on the road for all the right reasons. Say goodbye to unsightly scratches and chips – it's time to embrace the beauty of a well-maintained vehicle.
Please sign in first.
Sign inCreate a free account to save loved items.
Sign inCreate a free account to use wishlists.
Sign in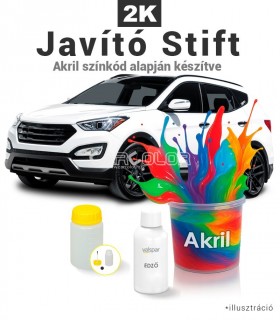


&media=https://www.carcolor.hu/shop/8776-large_default/corcos-plastic-touch-up-bottle-with-brush-50ml.jpg)
&media=https://www.carcolor.hu/shop/17461-large_default/2k-touch-up-paint-pen-brush-set-metallic-200-ml.jpg)