The integrity of a car's body panels is crucial for preserving the vehicle's lifespan and safety. Rust not only poses an aesthetic problem but can also compromise the structural integrity of the body panels, leading to more severe issues in the long run. Therefore, it is extremely important to address and halt the rusting process in a timely and appropriate manner. Removing rust at home can be not only cost-effective but also effective with the right tools and techniques. In this article, we will provide a detailed overview of the process, necessary tools, and techniques.
What is rust and how does it form?
Did you know that rust doesn't just attack older cars? But how does it form? Rust is a natural phenomenon that occurs when iron or its alloys come into contact with moist air.
Oxygen and water in the air react with the metal, forming hydrated oxide, which appears as the familiar reddish-brown powdery substance on the metal surface, known as rust. Rust formation is the consequence of an oxidation reaction, which specifically occurs with iron. While other metals can corrode, this process is not termed as rusting. This leads to the corrosion of iron and steel, during which hydrated iron(III) oxides and iron(III) oxide-hydroxides are formed on the metal surface.
RUST MUST BE REMOVED URGENTLY AS IT CONTINUOUSLY DAMAGES AND WEAKENS THE METAL STRUCTURE.
Surface inspection
The first step is to identify rust and assess the affected areas. Look for signs of corrosion on the car's body panels, including damage, bubbles, and peeling paint. Rust typically forms first on the lower parts of the car, fenders, and sills, but it can occur anywhere the paint is damaged or scratched.
Surface preparation - Necessary products
Once you've identified the location of the rust, the next step is to prepare the surface for removal. For this, you'll need some basic tools and materials, such as:
Wire brush and sandpaper: These tools will help remove rust and loose paint from the body panel surface easily.
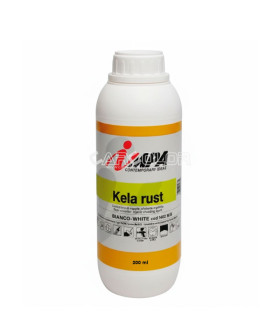
Rust converter or rust remover: After sanding, or in areas where you can't access properly, the use of a chemical rust converter is necessary.
Silicone remover: This product helps remove grease, oil, and other contaminants from the surface to make rust removal and painting more effective.
Masking tape and baking or newspaper: When removing rust, it's essential to mask off areas you don't want to scratch or damage.
Rust-inhibiting primer: For maximum protection, use a primer specifically designed for metal surfaces with rust-inhibiting properties.
Car putty: You can use fine putty or fiberglass-reinforced putty for creating a smooth surface.
Filler spray: This product seals the fillers, preventing them from absorbing paint, yet allowing excellent adhesion of the paint.
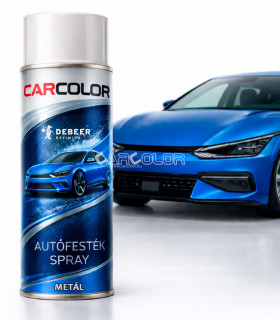
Car paint spray: If you wish to have a metallic color or clear coat, go for 2K paint spray.
Rust removal
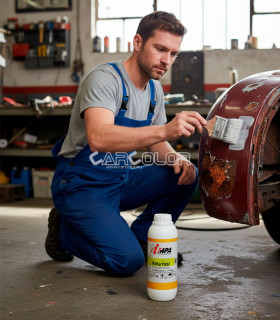
Once the surface is prepared, you can start removing the rust. There are two main methods, but the best approach is to combine them - Grinding and using a rust converter.
Start by using a wire brush to remove rust and loose paint from the surface. Thoroughly and carefully remove any layers where corrosion may have formed beneath the paint.
Grinding:
Use coarse sandpaper to sand down the affected surfaces. Use P120 grit wet sandpaper for this, making sure not to deepen the damaged areas excessively, but try to remove as much rust as possible.
Using a Rust Converter:
Clean the surface with silicone remover, then apply a chemical rust converter to the sanded areas using a brush or spray bottle.
Important: Pour the rust converter material into a separate container or spray bottle! Do not pour the unused product back into the original container, as it will cause a chemical reaction with the material in contact with the rust, ruining the entire box contents!
Wait for the chemical process to complete. This usually takes 2-3 hours, but may vary depending on the product used, so pay attention to the manufacturer's instructions. If everything went well, the color of the rusted areas will turn black. Do not sand off this layer, as it provides protection against further corrosion.
A frequently asked question is whether the converter damages the surfaces: There is no need to worry about the converter causing damage to the paintwork or harming the surfaces. Impa Kela Rust body rust converter can be safely used as it does not react with any material other than rust. However, always use gloves when handling any chemicals.
Priming:
Use rust-inhibiting primer for the best protection. Wipe the surface with silicone remover, then spray the selected product evenly. Before application, carefully read the manufacturer's instructions.
Using putty, if necessary:
Before applying the filler, thoroughly mix it with the hardener provided, according to the manufacturer's instructions. Typically, the mixing ratio of filler to hardener is 1-3%. This means that for 100 g of filler, 1-3 g of hardener should be added. Use a clean spatula or applicator to mix evenly.
Apply a sufficient amount of filler to fill in the defects and scratches, but be careful not to use too much. Smooth it out with a spatula for an even surface.
After applying the filler, allow it to dry properly before performing further work on the surface. The drying time of the filler depends on the ambient temperature, but it is generally quick. (It is also important to follow the manufacturer's instructions in this regard.)
After drying, sand down the surface to the level of the paint, using P120 - P220 sandpaper. If necessary, apply another layer of filler until the surface is perfect.
Using Filler Primer (Filler):
As mentioned earlier, but always important to note, do not paint over the filler. We will seal the finished and sanded surface with filler primer before applying the final paint layer. Since this product will be sprayed, it is important to mask off the parts and elements you do not want to paint to protect them from paint mist.
Before applying the filler, clean the entire surface again with silicone remover to ensure optimal adhesion of the paint.
Shake the car paint well before use according to the color code, and perform a few practice sprays on a cardboard to familiarize yourself with the spray and the spreading properties of the paint. It's better to apply more thin layers than a thick one to avoid paint runs. Apply 2-3 coats as needed, and observe 15-20 minutes of ventilation time between coats. (20 C)
Using Clear coat:
If you used metallic or base paint, then lacquering the surface is mandatory. For this purpose, it is advisable to use the highest quality 2K car lacquer, which is sold under the name Spray Max.
It is crucial that the 2K lacquer is applied to the paint within one hour of mattifying the base color. Start with a thin, gripping layer, and wait for about 15 minutes. Then spray a thicker layer of lacquer to achieve the desired thickness. Do not wash the car until it is completely dry, and avoid exposing it to rain or very high humidity! Wait at least a week before the first wash.
We hope that we have provided a detailed guide to repairing body rust and explained the important steps of the process. If you have any questions, feel free to leave them in the comments or ask our experts via the online chat interface.


&media=https://www.carcolor.hu/shop/17647-large_default/custom-filled-car-paint-aerosol-metal-colors.jpg)
&media=https://www.carcolor.hu/shop/17644-large_default/impa-1412-kela-rust-rust-converter-organic-chelating-agent-1l.jpg)
&media=https://www.carcolor.hu/shop/9613-large_default/indasa-mte-premium-masking-tape-80oc-36mm.jpg)
&media=https://www.carcolor.hu/shop/6520-large_default/kraft-small-paper-roll-tape-30cm-x-20m.jpg)