


Last items in stock
12,827 Ft
(tax incl.)
Online price
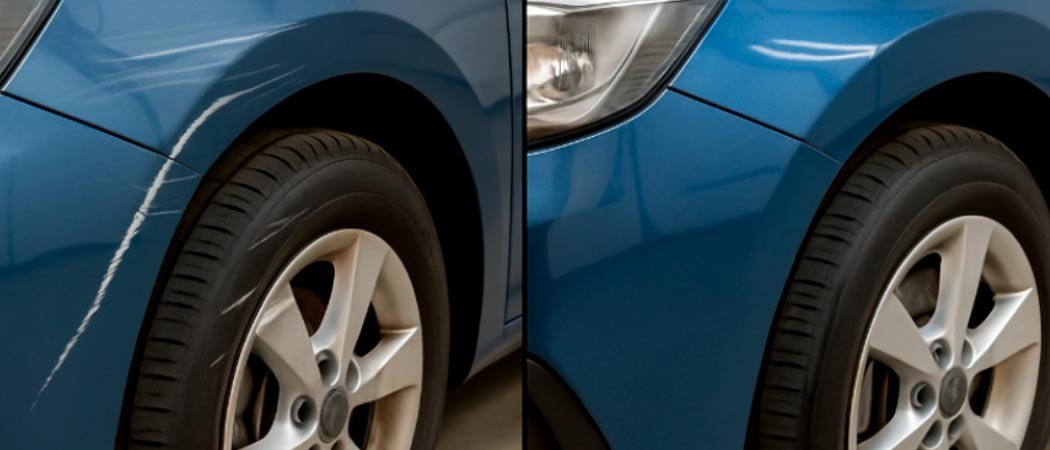
Minor paint imperfections and deeper scratches are inevitable parts of owning a car. No matter how careful you are, a stone chip, careless move, or parking mishap can damage your paint. Most body shops offer the same solution: repaint the entire panel. This is not only expensive but also time-consuming.
CarColor has been developing and manufacturing professional paint repair products for decades, allowing these types of damages to be effectively fixed even at home. Our experience and expertise in this field are unmatched, and our products offer solutions not only for professionals but for every car owner.
In this article, we introduce an advanced repair technique that approaches the quality of professional repainting, yet can be done at home if you have some experience and the right tools.
If you want to remove a deep scratch or minor paint damage precisely and cost-effectively, this method is the perfect choice.
We will show you how to fix a deep scratch using a professional technique, with minimal effort, and achieve nearly perfect results.
Metallic paint has a structure that differs significantly from traditional one-layer (UNI) paint systems, as it’s built up in multiple layers to achieve a shimmering, deep finish. Metallic base coats contain small metal particles that reflect light, giving the surface a dynamic sparkle. A clear coat is then applied to protect the paint and enhance the gloss effect.
This multi-layer structure makes repairing metallic paint more complex than standard acrylic finishes. While a solid color touch-up may only require a color-matched application, fixing a metallic surface requires precise work to replicate the distribution of metallic particles and the exact thickness of the clear coat. Any mismatch can result in visible differences in color or gloss.
The technique we present offers a simpler and much more affordable solution than repainting the entire panel – even for more serious damage.
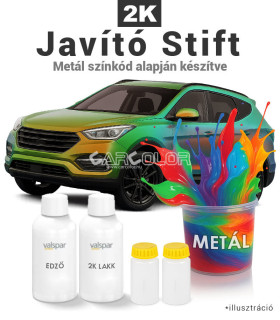
Required materials:
Properly preparing the surface is key to any paint job – and automotive touch-ups are no exception. Even a tiny stone chip or scratch requires thorough cleaning. Leftover waxes, shampoos, or coatings can severely impact adhesion. If the surface isn’t cleaned properly, the touch-up paint may peel off during the first wash.
That’s why a silicone remover is essential: this special solvent removes grease, wax, and residues without leaving a film, ensuring the paint adheres perfectly and lasts longer.
AFTER EXTERIOR WASHING, USE SILICONE REMOVER TO REMOVE INVISIBLE RESIDUE THAT COULD RUIN YOUR FINAL RESULT!
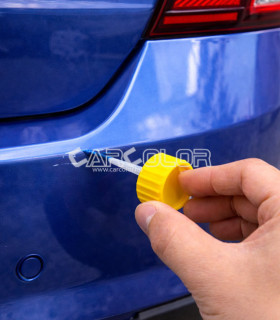
The correct ratio for 2K clear coat is 2:1 – two parts clear coat to one part hardener. Since we’ll use a very small amount, mix it drop by drop with a pipette or similar tool.
✅ Steps:
The goal here is to perfectly match your car’s original color. Mix thoroughly until the paint is completely uniform and smooth.
✅ Steps:
Test the mixture on a small damaged area and let it dry. While wet, the paint will appear darker. Since brush application creates a thicker layer, the result may look darker. If needed, adjust the color with the included silver pigment.
✅ If the paint is too dark:
If the match is good, proceed with the actual scratch repair.
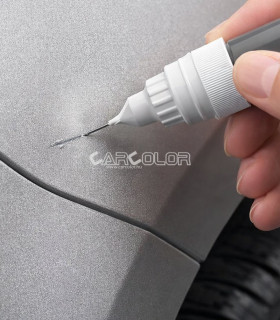
Use the included needle-tip applicator for precise application. Carefully fill in the scratch. After painting, allow the 2K paint to fully cure. Wait at least 24 hours before continuing.
CLEAN THE APPLICATOR IMMEDIATELY! Rinse any leftover paint using the provided thinner – if it hardens, the applicator will be unusable!
No, we didn’t skip a step – but before continuing, we need to introduce a tool essential to achieving a professional result.
A lacquer scraper is a small, double-sided precision tool designed for removing paint imperfections.
It’s an essential tool for fixing issues like runs, embedded dust, or uneven layers during car painting. Instead of sanding or repainting, the scraper offers a more precise and gentler approach.
The Mirka lacquer scraper is a professional-grade tool widely used by paint specialists to correct surface flaws safely and effectively.
Unlike sandpaper, which can remove too much material, the scraper allows for precise correction without damaging surrounding areas – perfect for removing runs, debris in the clear coat, or elevated touch-up paint.
Enough with the promotion — let’s continue!
Using a lacquer scraper requires precision and attention to avoid deeper scratches. Follow these steps to use it safely and effectively:
The scraper has one finer and one rougher side. Use the fine side for minor defects, and the coarse side for larger paint runs. We highly recommend using only the fine side in this repair unless you are completely confident in using the rough side and know what to expect.
Do not tilt it! Hold the scraper perpendicularly to the surface to avoid scratching the surrounding areas.
Do not press down! Use light, even strokes over the damaged area to carefully shave down the excess paint.
The lacquer scraper helps remove excess paint and smooth out the repaired area for a flawless finish.
| Mistake | Cause | Solution |
|---|---|---|
| Scratches too deep | Too much pressure or incorrect angle | Use less pressure and work at a flatter angle. |
| Uneven lacquer layer | No polishing after scraping | Polish the area with a fine compound after scraping. |
| Clear coat became too thin | Scraped one spot too long | Work in short strokes and check the surface regularly. |
Using a lacquer scraper for a professional finish without repainting
Please sign in first.
Sign inCreate a free account to save loved items.
Sign inCreate a free account to use wishlists.
Sign in


&media=https://www.carcolor.hu/shop/17181-large_default/rupes-ceramic-denibbing-blade-25cm-x-25cm.jpg)
&media=https://www.carcolor.hu/shop/17657-large_default/2k-touch-up-paint-pen-brush-set-metallic-200-ml.jpg)
 - OFO&media=https://www.carcolor.hu/shop/15340-large_default/silicone-remover-1l-ofo.jpg)